Employee time off requests in Time Clock MTS are a convenient and easy way for employees to request time off. The time clock administrator can then approve or deny these requests and automatically create time punches for the requested time off period. In previous Time Clock MTS How-To Articles I talked about setting up Time Clock MTS to allow employees to request time off, how employees place time off requests, and how the time clock administrator uses the time off request management screen. This article covers how an administrator approves a time off request.
1. The Administrator Time Off Requests Screen
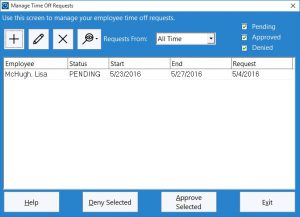
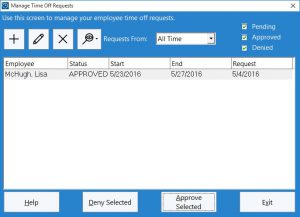
To approve a time off request the time clock administrator must use the Administrator Time Off Requests screen. This is accessible from within the Time Clock MTS Administrator program via the Tools->Time Off Requests menu. You can see this screen above. To approve a request click on it in the list (it must have the PENDING status) and click on the Approve Selected button.
2. The Add Times for Time Off Request Screen
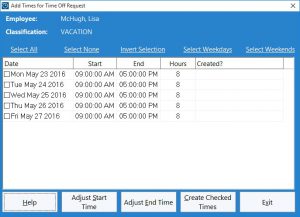
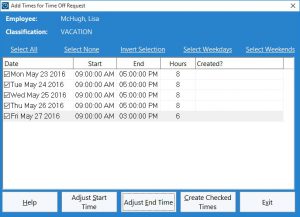
The Add Times for Time of Request screen (see above) is then displayed. This screen is used to create time punches for each of the days the employee has requested off. The screen allows users to select what days in the period to create punches for, and allows adjustment of the start and end time of each day in the time off period. Links are provided above the list to allow users to select different days during the period, for example, all the days, the weekdays, or the weekends.
3. Select the Times to Create
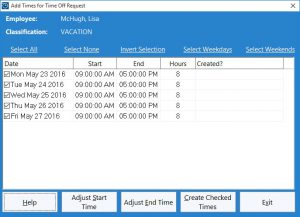
The first step is to select the days to create punches for. In this example we shall create a clock in and out for each day. To do this we can either check the boxes next to each day in the list or click on the Select All link. Note in the image above that all days have the checkbox next to them ticked. Note also that we’ve selected the last day in the period because we want to change the end time for this day (perhaps employees work a shorter day on Friday).
4. Adjust the Start / End Times
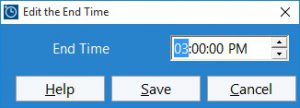
Once the day you want to adjust the time for is selected click the Adjust Start Time or Adjust End Time buttons as required. In this case we’re going to adjust the end time to 3:00PM. This is done using the screen shown above. Click the Save Time button to save the change.
5. Create the Time Punches
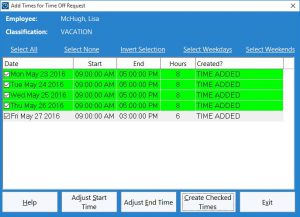
In the screenshot above you can see that we’re ready to go. All of the days we want to create punches for are checked and the end time for Friday has been changed to 3:00PM. We can now go ahead and create the time punches by clicking the Create Checked Times button. Time Clock MTS will now attempt to create punches for each of the selected days.
6. Check the Times
As Time Clock MTS creates (or cannot create) a clock in and out for each day the color of each day in the list will change and a message will be displayed alongside of each . Days that successfully have a clock in and out created will be green while those that do not will be red. Above you can see that we’ve created all of the time punches successfully for this time off request. We can now click the Exit button and we’ll be shown the Approval Notes screen.
7. Enter Approval Notes
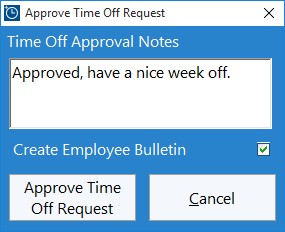
On this small screen (see above) we can add some notes to go along with the approval for the time off request. If the Create Employee Bulletin checkbox is ticked then the employee will be shown the approval notes via a popup bulletin the next time they clock into Time Clock MTS. Click the Approve Time Off Request button to proceed back the Administrator Time Off Requests screen. Note that at this stage you can still click the Cancel button to stop the approval process but any time punches created in the previous steps will not be deleted.
8. You’re Done!
In the screenshot above we can see that the time off request now has a status of APPROVED. The time off request approval process is now complete.

