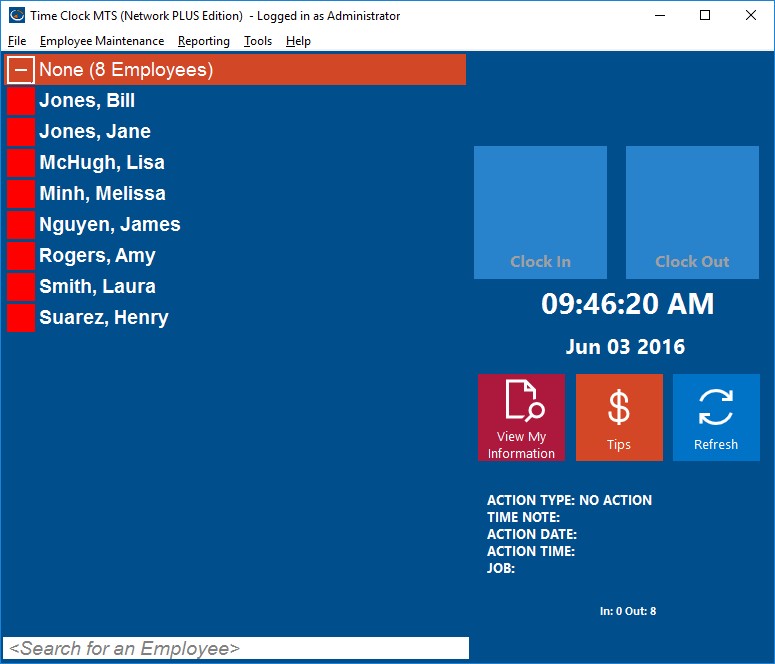
Time Clock MTS has some features that allow you to create multiple employees for your time clock system quickly and accurately. This can significantly speed up the process of setting up Time Clock MTS for the first time as well as adding new employees to an existing system. It can also help to greatly reduce data entry errors when creating new employees.
This Time Clock MTS How-To Article takes you through the process of creating four new employee records using the Export Employee Data and Import Employee Data features within Time Clock MTS.
1. Export Your Existing Employees to Microsoft Excel
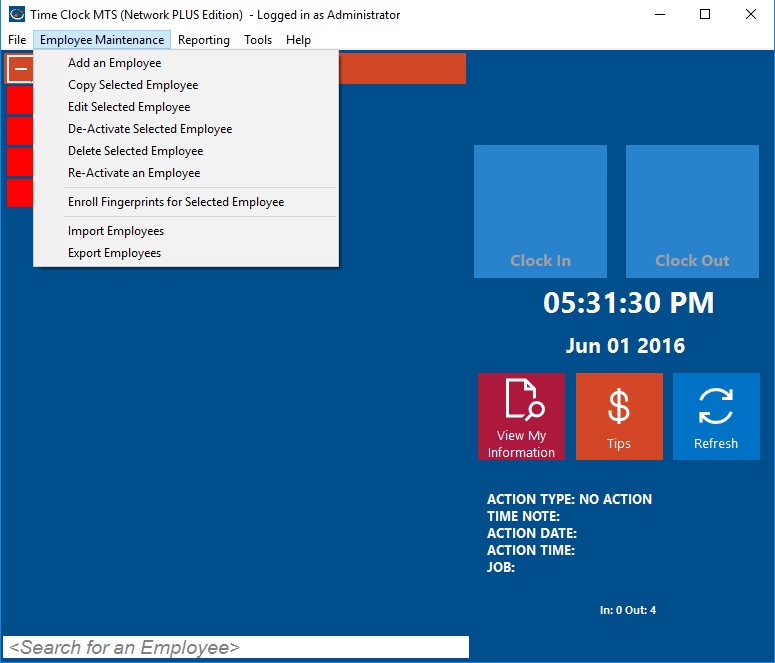
This process relies on you having some existing employees in your Time Clock MTS database and that you have Microsoft Excel installed on your computer. Log into the Time Clock MTS Administrator program as the admin and go to the Employee Maintenance->Export Employees menu (see the image above).
2. Confirm the Export Employees Action
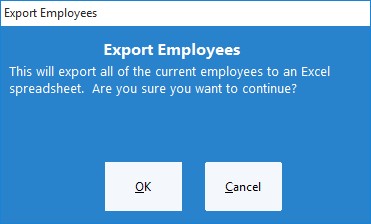
Time Clock MTS will ask you to confirm the export employees action (see the image above). Click the OK button to proceed.
3. View the Exported Employee Data
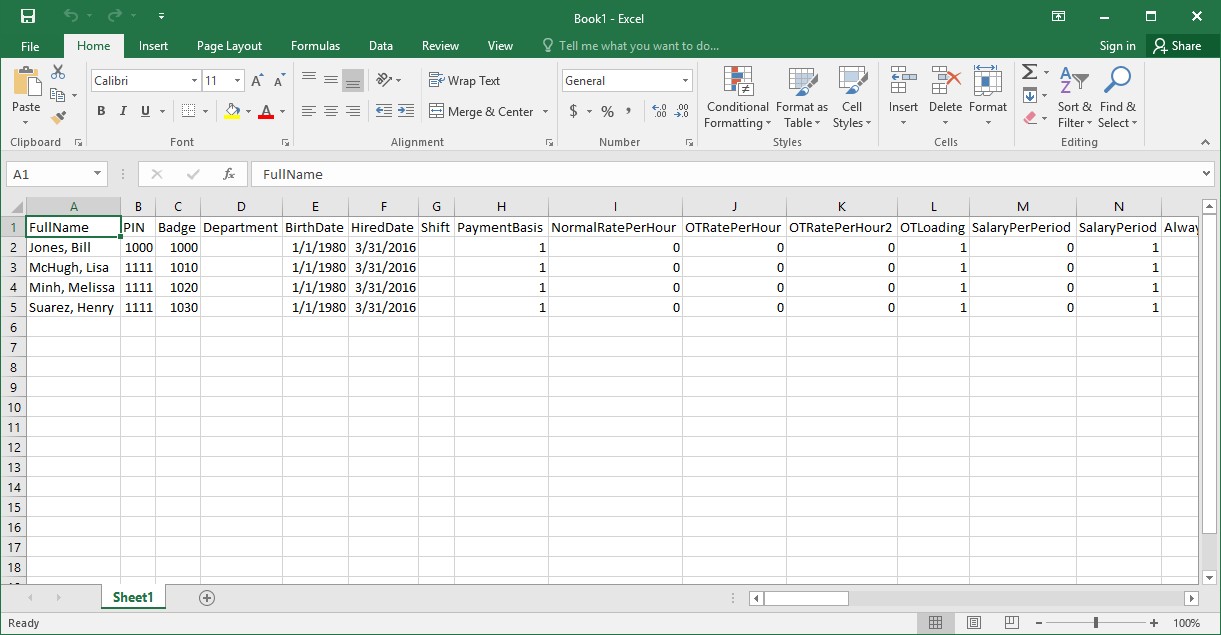
A Microsoft Excel window will appear containing your existing employee data (see the image above). It is important to realize that Time Clock MTS uses the Employee Badge as the unique identifier for each employee. The consequence of this is if you change the Badge numbers of the employees in your exported data to new numbers and import that data back into Time Clock MTS it considers them to be entirely new employees.
4. Edit the Exported Employee Data
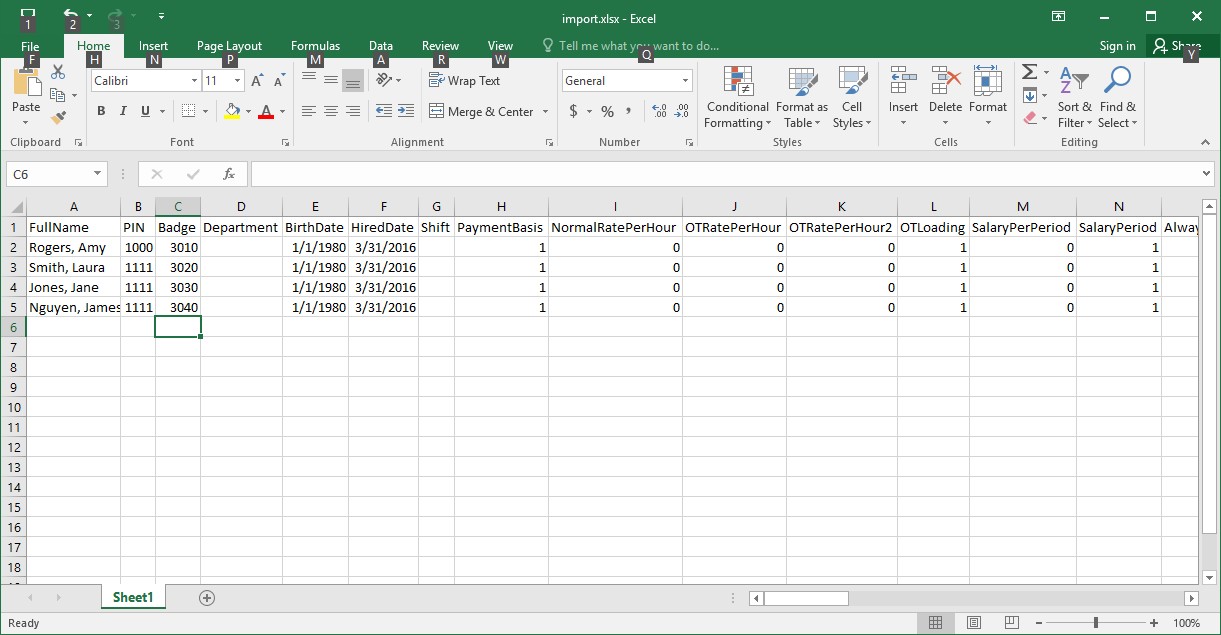
We’re going to change the employee name column of each exported employee and (most importantly) give each one a new badge number. You can see what this might look like in the image above. You should note that at this step you could create copies of your employee data rows and create as many new employee records as you like, conversely you could delete export rows and create fewer new employees than you exported. The choice is yours. In this example we exported 4 employees and we’re going to create four new ones.
5. Save the New Employee Data
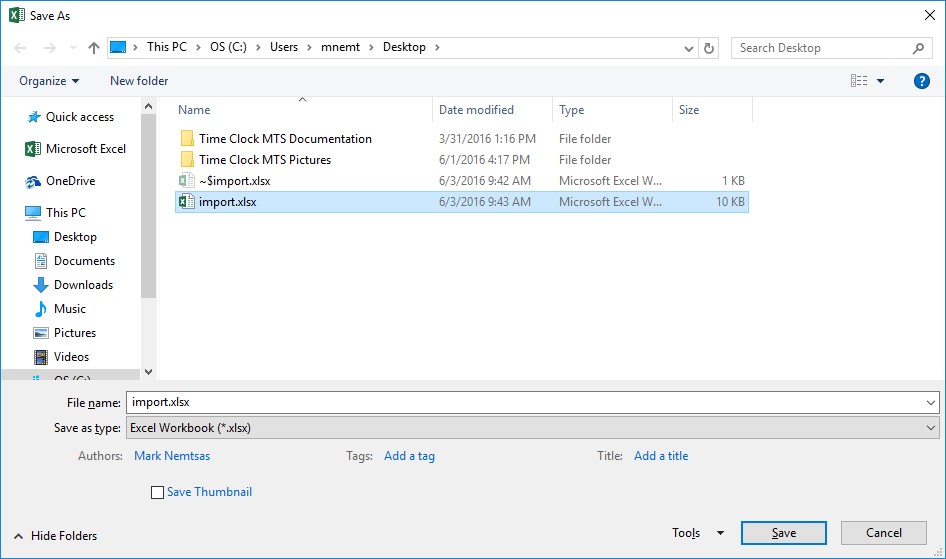
The next step is to save the Microsoft Excel spreadsheet that contains your new employee data. Note the location where you save it because you’ll need to know the location in the following steps. In our example I saved the spreadsheet to a folder on my Windows desktop (see image above).
6. Import the New Employee Data Back into Time Clock MTS
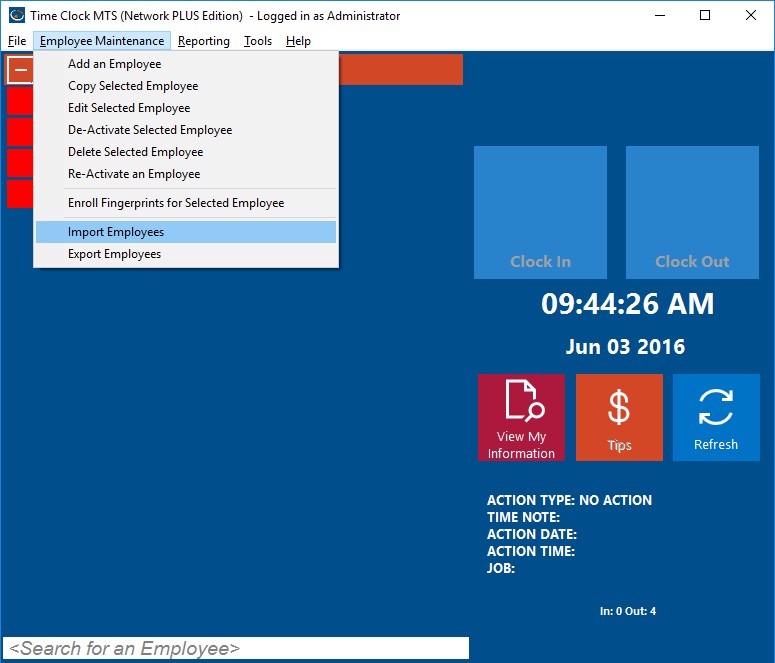
While still logged into Time Clock MTS as the administrator go to the Employee Maintenance->Import Employees menu (see above).
7. Select the New Employee Data Spreadsheet
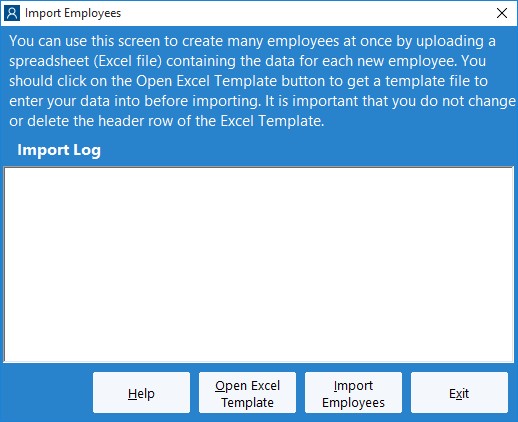
On the Import Employees screen (shown above) click the Import Employees button. This will allow you to navigate to where you saved your new employee data in Step 5. Once you’ve found it open the file.
8. Watch the Employee Import Process
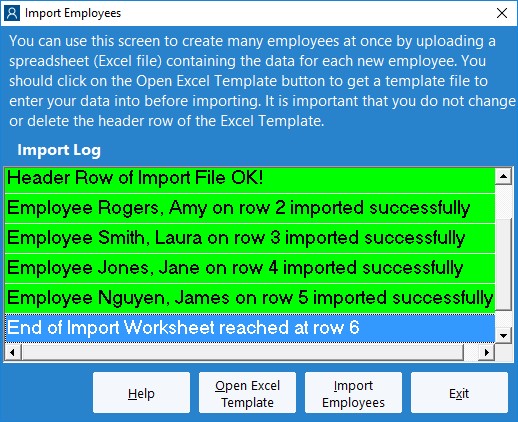
Time Clock MTS will now import the new employee data from the spreadsheet. As it imports each employee a message will be displayed on the Import Employees screen telling you whether that employee was created successfully or not. When the process is complete the Import Employees screen may look something like the image shown above. Note that each new employee is reported as being imported successfully.
9. View Your New Employees
The final step is to exit out of the Import Employees screen by clicking the Exit button. When we are returned to the employee time clock we can see that the new employees are present on the employee list.
Important Note
If you happen to try to import an employee whose badge number matches the badge number of an employee that is already present in your Time Clock MTS database do not worry. The Import Employee process will not import that employee and leave your existing employee information intact.

