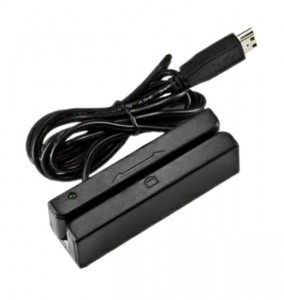
If required Time Clock MTS can be used without a keyboard by using a touch screen or a magnetic card reader or a barcode reader. Today I’ll talk about using Time Clock MTS with a magnetic card reader. In its most simple form a magnetic card simply has normal text characters (like those you’d type on your keyboard) stored in the magnetic stripe on the card. In fact, some of the simplest magnetic card readers can plug into the keyboard port or USB port on your computer and output text characters to the computer EXACTLY the same way that a keyboard does. This is known as a “keyboard wedge”. If your card reader doesn’t allow this you’ll usually find that it comes with some software that allows it to emulate a keyboard, which is known as a “software wedge”.
So, for example, if you had a magnetic card with the characters “hello world” stored in the magnetic strip and you had a magnetic card reader plugged into your keyboard port (or emulating a keyboard with a software wedge) and you scanned the card while you had a text editor (like MS Word) running then you’d see the characters “hello world” appear on your monitor. And in all likelihood you’d get the “enter” or “return” character at the end of the line. Most magnetic card readers output the “return” character at the end of the data scanned from a magnetic card by default so that you know you have all of the data from the magnetic card.
If you’re using the Employee List Interface of the software and you want to use it with a Magnetic Card reader then you should follow the detailed instructions shown here.
However, if you’re using the keypad interface of Time Clock MTS you’ll need to use the card reader a little bit differently. On keypad screen you can use a magnetic card reader to output characters to the employee ID/badge number field and the “return” or “enter” character “presses” the Enter button on the screen to clock the employee in or out. So, the practical upshot of this is if you have magnetic cards encoded with Time Clock MTS employee badge numbers (or employee ID’s) then you can use them to clock your employees in or out of Time Clock MTS very quickly and easily. In summary here’s a checklist of what you should look for in a magnetic card reader:
- Look for a magnetic card reader that can plug into the keyboard port (PS2) or USB port of your PC and output text exactly like a keyboard which is typically known as a “keyboard wedge”. If it cannot do this, check to see if it comes with a software program that allows it to emulate a keyboard, known as a “software wedge”.
- Look for a magnetic card reader that can output a return or line feed character at the end of the data read of a swipe card.
- You only need the most basic of magnetic cards, they only really need one ‘stripe’ and the data doesn’t need to be encrypted or anything fancy.
- Get your magnetic cards encoded with the Time Clock MTS Badge/Employee ID’s. These ID’s are setup on the Employee Information Screen.
- Stick to the default employee numbering in Time Clock MTS (which starts at 1000 and increments by 10 for each new employee). This will allow you to buy pre-encoded magnetic cards that can be used as your company expands. So your cards would be encoded with the numbers 1000, 1010, 1020 etc etc.


