Version 2 of Time Clock MTS included a complete re-work of the way reports functioned, and allowed you do configure the appearance of reports to suit your requirements. In this weblog entry I’ll cover the basic elements of customizing reports, in subsequent entries I’ll take a look in detail each aspect of doing so.
Report Structure
Each Time Clock MTS report has the same basic structure, this is best illustrated by the following simple diagram.
<Report Header>
<Company Header>
<Employee Header>
<Employee Details>
<Report Data>
<Employee Summary>
<Employee Accruals>
<Payroll Information>
The first 2 report sections are displayed once per report, the last 6 sections are displayed for each employee you choose to run the report on. All of these report sections except the <Report Data> section can be customized to your requirements. The report data section contains the data for the report that you are currently running.
How Are Report Sections Customized?
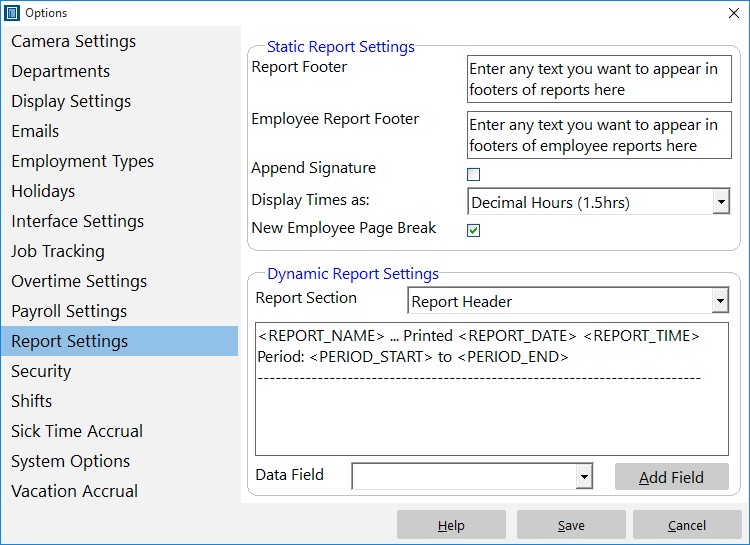
Reports are customized by configuring each report section using the Tools->Options->Report Settings page.
You can read more about this page in the Report Settings help topic. In basic terms you use this screen to customize report sections by selecting a report section, and configuring the section template using either free text or by inserting data fields using the Add Field button and drop down.
What is a Section Template?
A section template is simply the text that defines the format of a Report Section. A section template can contain any text you like and can contain Data Fields. Each section template has a number of Data Fields that can be added to it.
What is a Data Field?
A Data Field is text that can be included in a section template that is automatically replaced by Time Clock MTS when reports are generated. For example, if you include the Data Field
Next time, in part 2 of report customization I’ll cover some of the report sections and the data fields that are available to each.


