QuickBooks Payroll Data Integration
Time Clock MTS can be set up to export employee time data directly to QuickBooks to allow payroll to be processed quickly and easily. This support article takes the Time Clock MTS user through the required steps to configure the software to export data to QuickBooks and then through the process of actually exporting timeclock data to the QuickBooks payroll software.
Configure the Software for QuickBooks
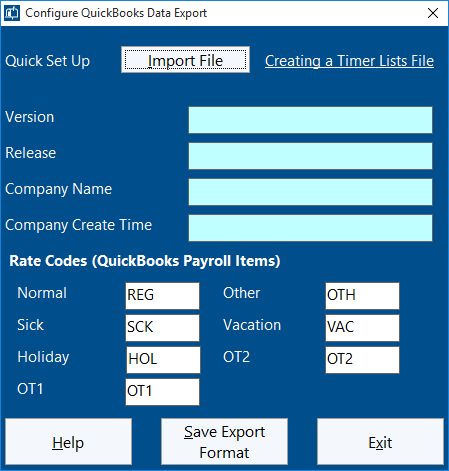
The software can be configured for QuickBooks from the Reporting->Configure QuickBooks Data Export menu. This menu is only available while logged in as the time clock administrator and is not available in the Time Clock MTS Client program. The configuration screen appears below.
The top four data fields (Version, Release, Company Name, and Company Create Time) are obtained from QuickBooks. The easiest way to get those values is to import a Timer Lists Activity file from QuickBooks.
Importing a Timer Lists Activity File
To import a timer lists activity file you must first use QuickBooks to create one. That process is covered in our blog article, how to create a QuickBooks Timer Lists File. Once created importing the file is simple, just follow this process:
- Click the Import File button and confirm that you want to import a timer lists file into Time Clock MTS.
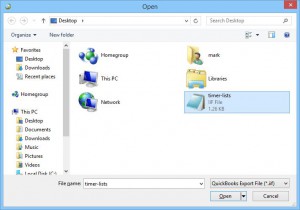
- Locate the timer lists file you created with QuickBooks (see below) and click the Open button to select the file.
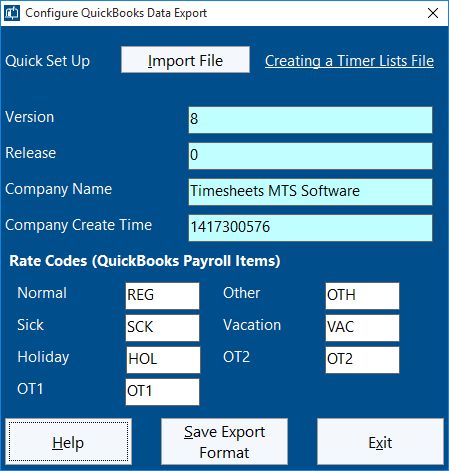
- If the file is valid then the software will indicate a successful import and populate the four data fields with information from the timer lists file (see below).
If you wanted to manually enter the four vital data fields you can simply open up your QuickBooks timer lists file in Windows Notepad and you’ll see the values on the second line of the file. The values can then be entered into the appropriate fields in Time Clock MTS. You can see what the timer lists file looks like in the image below:
Rate Codes and Payroll Items
The data exported to QuickBooks to process payroll can include rate codes that map to QuickBooks payroll items if required. If you do not want this feature then simply erase the contents of the Rate Codes fields and click Save to save the QuickBooks export configuration because you are finished with this step of the configuration process.
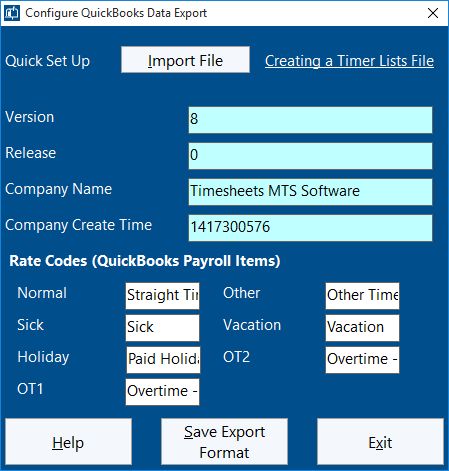
However, if you do it’s simply a matter of entering the payroll items that match each time clock rate code. For example, Normal Time in Time Clock MTS might correspond with Straight Time in QuickBooks, OT1 could match to Overtime – Time and a Half and so on. When the rate code fields are filled it could look something like the image below:
When you are happy with the rate codes click Save to save the QuickBooks export configuration as you are finished with this step of the configuration process.
Configure Employees
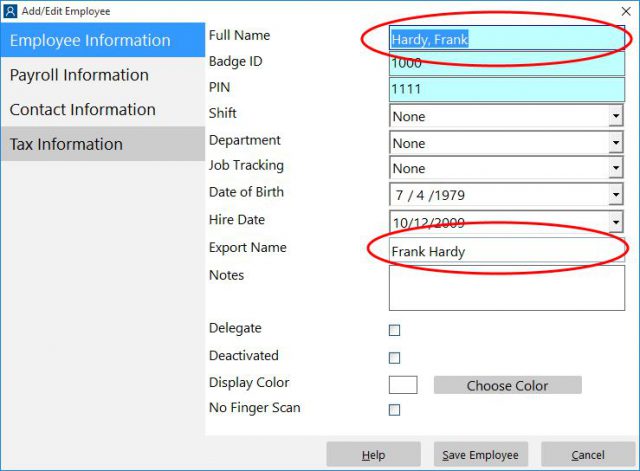
It is important that you map your Time Clock MTS employees to your QuickBooks employees. This is done by matching the names of the employees in both systems. In QuickBooks you’re going to need to note down the name of each of your employees whose time clock data you want to track with Time Clock MTS. Then, in Time Clock MTS go to the Employee Maintenance->Edit Selected Employee screen (or double click on the employees in the employee list) and you’ll be shown the Employee Information screen (see below).
The two fields of interest here are the Full Name and Export Name fields. The Full Name field is used for exporting data to QuickBooks if the Export Name is left blank. If (for whatever reason) you want the name of employees in Time Clock MTS to be different to that in QuickBooks then you can enter the name of the employee in QuickBooks into the Export Name field. Then that value will be used for QuickBooks data exports.
Creating the Export Data for QuickBooks
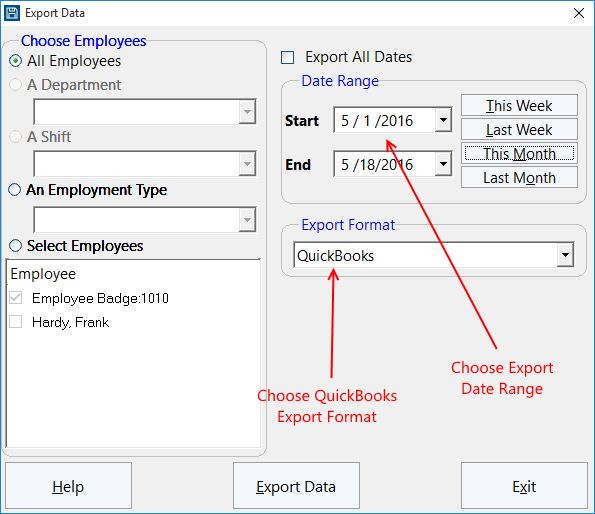
To create an export file for QuickBooks use the Export Data screen which is available from the Reporting->Data Export->Export Menu. You can see that screen below.
Select the employees you want to export time clock activity for on the left side of the screen. Choose the date range you want to export on the top right and make sure to select the QuickBooks export format from the drop down box on the middle right of the screen.
When you are happy with the export settings click the Export Data button. In a few seconds you’ll see a Windows Notepad window appear containing your data that can imported into QuickBooks (see below). Use the File menu of the Notepad window to save the file and note down the location because you’ll need to know it when you import the data into QuickBooks. Make sure to save the file with the .IIF extension so that QuickBooks can import the file.
Importing the Time Clock Data into QuickBooks
While logged into QuickBooks you can import the data file created by Time Clock MTS by following this process:
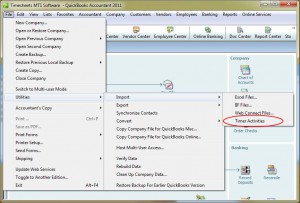
- Click the File->Utilities->Import->Timer Activities menu (see image above).
- In the window that appears navigate to where you saved your export data file from Time Clock MTS and click the Open button.
- QuickBooks will show you a message that your time clock data has been exported successfully, click the OK button.
- You’ll then be shown a QuickBooks window that includes timesheets for the employee’s whose time clock data was imported successfully.
Time Clock MTS
The Easy Time Recording System
Time Clock MTS
The easy to use time recording software with a fully functional 30 day trial.
Buy Time Clock MTS
Purchase a registration key from our online shop. Only buy once, no monthly fees.

