A key problem with any time clock system is that of employees that clock in and out for each other. This is known as ‘buddy punching’ and is the main method by which employees try to manipulate their time card information. The use of magnetic cards, proximity devices, and PINs can help reduce buddy punching, but of course it does not prevent employees sharing their card, prox device, or even their PIN with a co-worker and still providing fraudulent data.
There are a couple of ways of eliminating buddy punching, one of these is capturing an employee image at the time of clocking or out. Using a computer along with Time Clock MTS and cheaply available web cameras allows you to have a very secure time and attendance solution that can largely eliminate buddy punching and help reduce your payroll costs accordingly.
Camera Hardware Requirements
You don’t need anything special to allow Time Clock MTS to capture images when employees clock in and out. Time Clock MTS will work with almost any sort of USB or integrated web camera, if your version of Windows can detect your web camera then Time Clock MTS can probably use it.
Software Requirements
There are no additional software requirements, if you have Time Clock MTS Version 2.0.2 or newer then you have all the software you require to use a camera with Time Clock MTS. You can always download Time Clock MTS from here.
Setting Up Time Clock MTS to Use a Web Camera
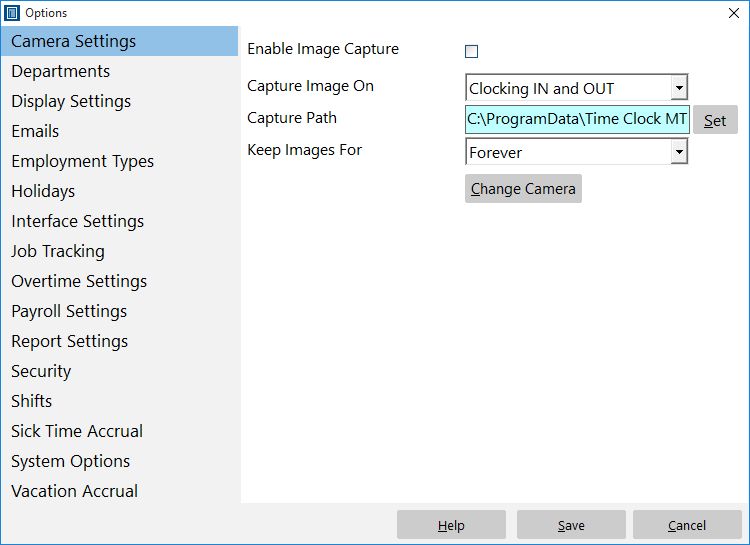
Just make sure your web camera is plugged into your computer and then run Time Clock MTS and log in as the administrator. Go to the Tools->Options->Camera Settings page. You’ll see the following screen:
If your camera is connected properly and is accessible by Time Clock MTS just check the Enable Image Capture check box. See below for a range of configuration options to setup image capture to suit your requirements:
- You can decide when you want to capture images (clock in, clock out or clock in and out), it is recommended that you capture images on both events for maximum security.
- The image capture location can be easily set using the Set button. By default it will have the location set to the same directory that your Time Clock MTS database is stored in.
- Because captured images take up disk space you may decide to only keep the recorded images for a certain amount of time. Time Clock MTS can delete older images based on their age, you can decide to keep images for a week, a month, 6 months, or forever.
- If you have more than one camera attached to your Time Clock MTS computer you can choose which one to use by clicking the Change Camera button. Time Clock MTS will default to the first camera attached to your computer if the selected camera is no longer attached to the PC.
- Time Clock MTS captures images into JPEG format.
Viewing Captured Images
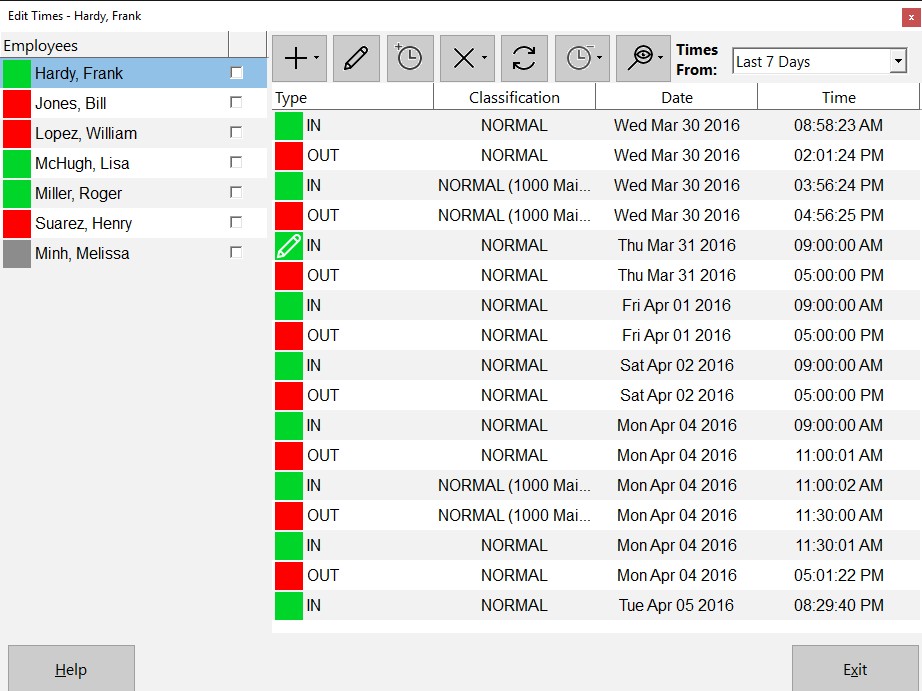
If you suspect that buddy punching is going on in your work place then you can view captured images easily from within Time Clock MTS. While you are logged in as the administrator go to the Tools->Edit Times screen.
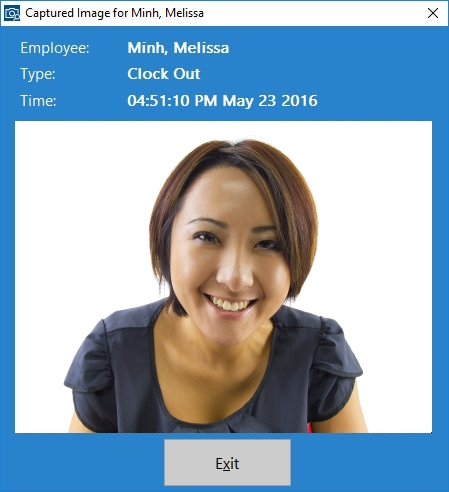
You will see a the View button in the toolbar above the list of times, this is the button with an eye and magnifying glass icon on it. Just select the time you wish to view the captured image for, and then click the View button. You’ll then be shown the following screen showing your captured image along with the clock in/out and user details that are associated with the captured image.
That’s all there is to it. If you have a web camera and want to ensure that your time clock information is secure and accurate then I’d strongly recommend using this feature to help reduce your payroll costs!


