by Mark Nemtsas | Aug 9, 2012 | Tips and Tricks, Using the Software
Here’s an email we received recently from a user of Time Clock MTS.
We have been using your time clock software for a few years now and are really happy with how it has been working. About six months ago we upgraded one of our PCs to a newer Windows 7 computer. We purchased a new License for Time Clock MTS for the new machine and it has been working very well up to today. The computer developed a PSU issue and will not boot. We are trying to get the power supply replaced but it may have more issues.
My questions are:
Is there any way to retrieve the clock in and out times without accessing the HDD on the broken computer?
By default our employee timeclock system installs a database on the local disk when you first install the software. If that disk happens to fail and you haven’t moved the database then the database (and all the time clock data therein) will be lost. So, no, there’s no way this user can retrieve their clock in and out times if they have no access to the HDD of their PC.
To prevent this sort of disaster you should keep your Time Clock MTS database on your network server where it is backed up with all your other files (you do have backups don’t you?). Actually moving the database to your network server can be done within Time Clock MTS itself. That process is pretty simple and covered completely in the How to Move the Time Clock MTS Database how-to article.
The moral of the story is, if you have shared network drive that is backed up then you should be using it to store your Time Clock MTS database. This will prevent you from losing your data in the event of hardware failure.
by Mark Nemtsas | Aug 9, 2012 | Tips and Tricks
A common question we get asked is whether purchasing our employee timeclock software is a one-time fee or is there a monthly or annual fee to keep using the software. Quite simply you pay once to use the software but there can be on-going support costs if you require our assistance. Here’s how it works in more detail:
- The purchase gives you a lifetime license to use that major version of Time Clock MTS. Currently we’re at version 5.1.2, so the major version is 5. If you were to purchase Time Clock MTS now your registration key would work until the software went to version 6. But of course, you can keep using Version 5 indefinitely, you do not have to upgrade.
- The purchase entitles you to one year of email support and access to software updates. If the software goes up a major version within this year you’ll get a new registraton key for the new version.
- After the first year email support (and software updates) is $25 (US) for the Stand Alone Version, $50 (US) for the Network Version, and $100 (US) for the Network PLUS Version. Purchasing support is optional, your registration key will keep working whether you purchase it or not. You just will not be entitled to any email support or access to new versions of the software if you do not have a valid support contract.
by Mark Nemtsas | Aug 9, 2012 | How To
This Time Clock MTS How To Guide explains the process of moving your employee attendance database to a different location. This is useful if you do not want to store your valuable time clock data on your local computer but rather on your network server where the file is backed up and more secure.
1. Close All Time Clock MTS Clients
The first step is to close all Time Clock MTS client programs. If a client is still connected to the Time Clock MTS database you are trying to move then it will not be able to be moved.
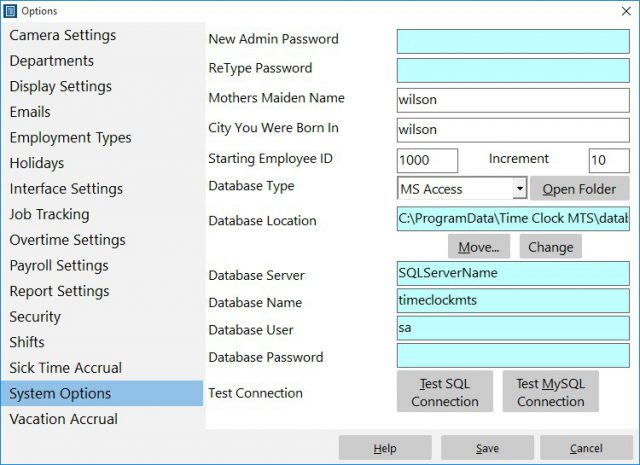
Figure 1 – The System Options Screen
2. Navigate to the System Options Screen
The next step is to log into Time Clock MTS administrator program as the administrator and go to the Tools->Options->System Options screen. On this screen we can see that the database location is on the local c:\ drive. To move this file click the Move button.
3. Select the New Database Location
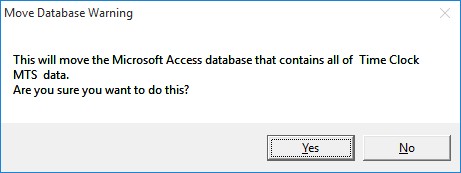
Figure 2 – Confirm Database Move
Confirm the move action by clicking Yes on the screen above.
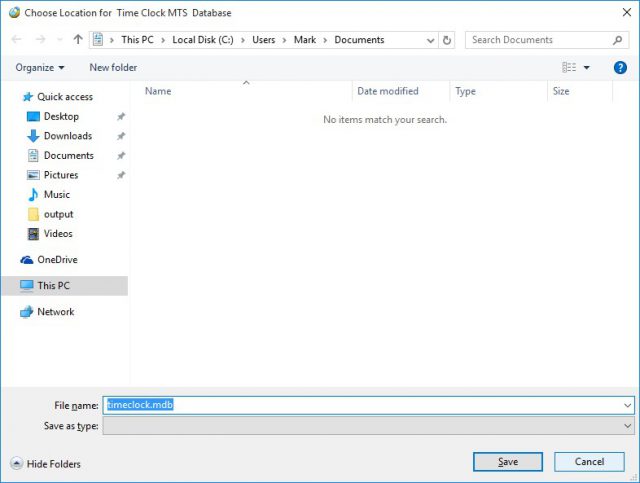
Figure 3 – Select a Location
We’ll then be shown a folder browser window similar to the one above. In our example we’ve prepared a network drive that we’re going to move the Time Clock MTS to. It can be seen at the lower left of the above screenshot and is called “Time Clock MTS” and has been mapped to the X:\ drive. We should note that Time Clock MTS must have full/read write permissions on the folder that you’re going to store the Time Clock MTS database in.
We’re going to click on the new database folder now.
4. Save the New Location
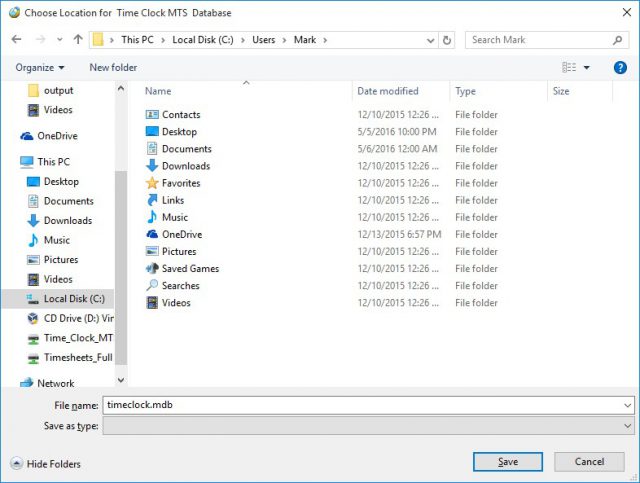
Figure 4 – Location Selected
Once the new location is chosen the folder browser window looks like the screenshot shown above. We’re going to confirm the move by clicking the Save button.
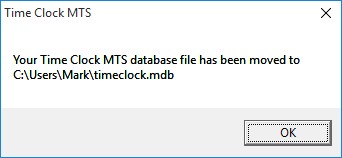
Figure 5 – Database Move Successful
The folder browser window will now close and Time Clock MTS will display a message similar to the one above informing us that the database has been moved. This message can be acknowledged by clicking the OK button.
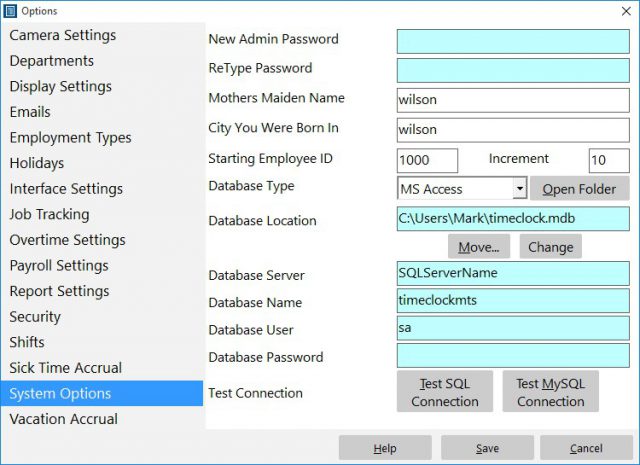
Figure 6 – New Database Path
We’ve now been returned to the System Options screen. We can see that the Database Location has been changed to our selected location.
Moving the Time Clock MTS database is now complete. Note that the next time you run any Time Clock MTS clients you’ll be asked to connect to a database and you’ll need to navigate to this new location on the client computers.
by Mark Nemtsas | Apr 23, 2012 | How To, Tips and Tricks
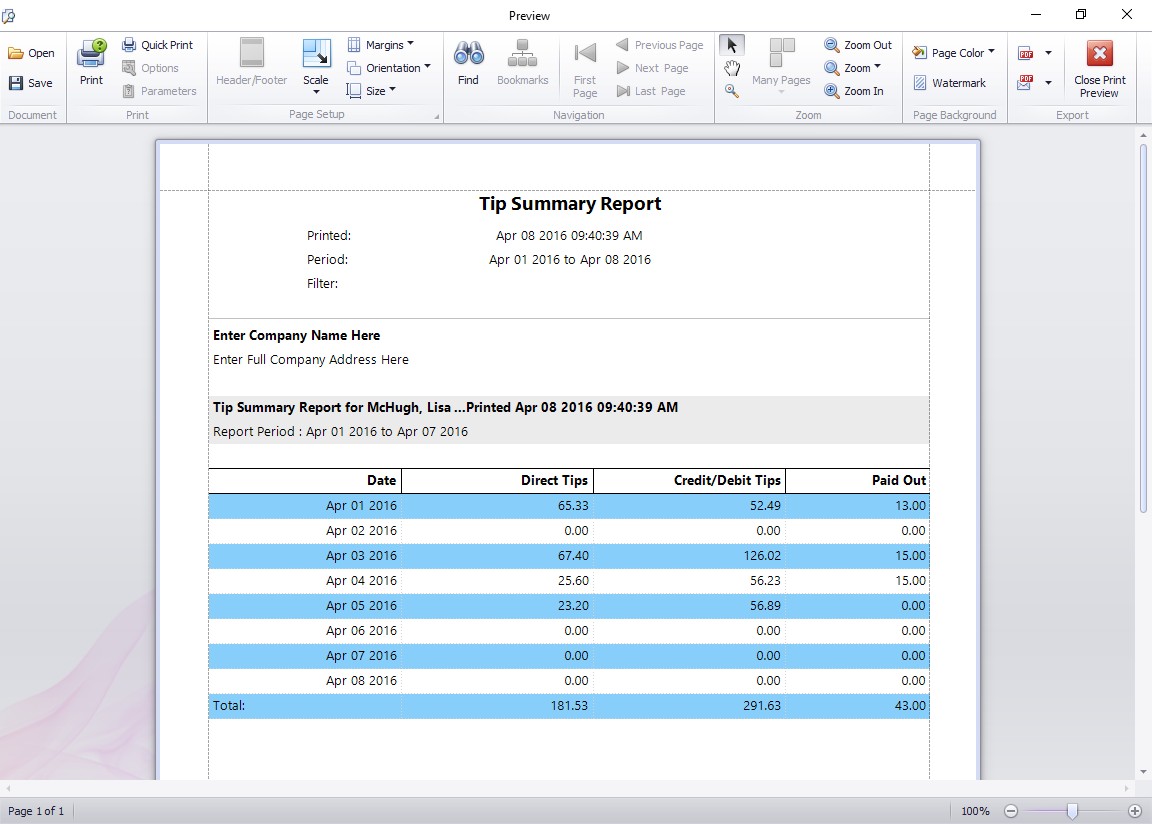
The Tip Summary Report
This Time Clock MTS How To Article covers how you can run reports on employee tips. There are three main employee tip reports in our tip tracking software and this how to article describes each in detail. Employee Tip reports can be run from the Reporting->Payroll Reports screen and you must be logged in as the Time Clock MTS administrator to access the reports. As is normal with most other Time Clock MTS reports you can run any of the tip based reports for a date range, one or many employees, or by department.
The Tip Summary Report
The Tip summary report (shown above) gives a day to day breakdown of tips for each employee. This includes a daily report on tips received directly, credit/debit card tips received, and tips paid out to others.
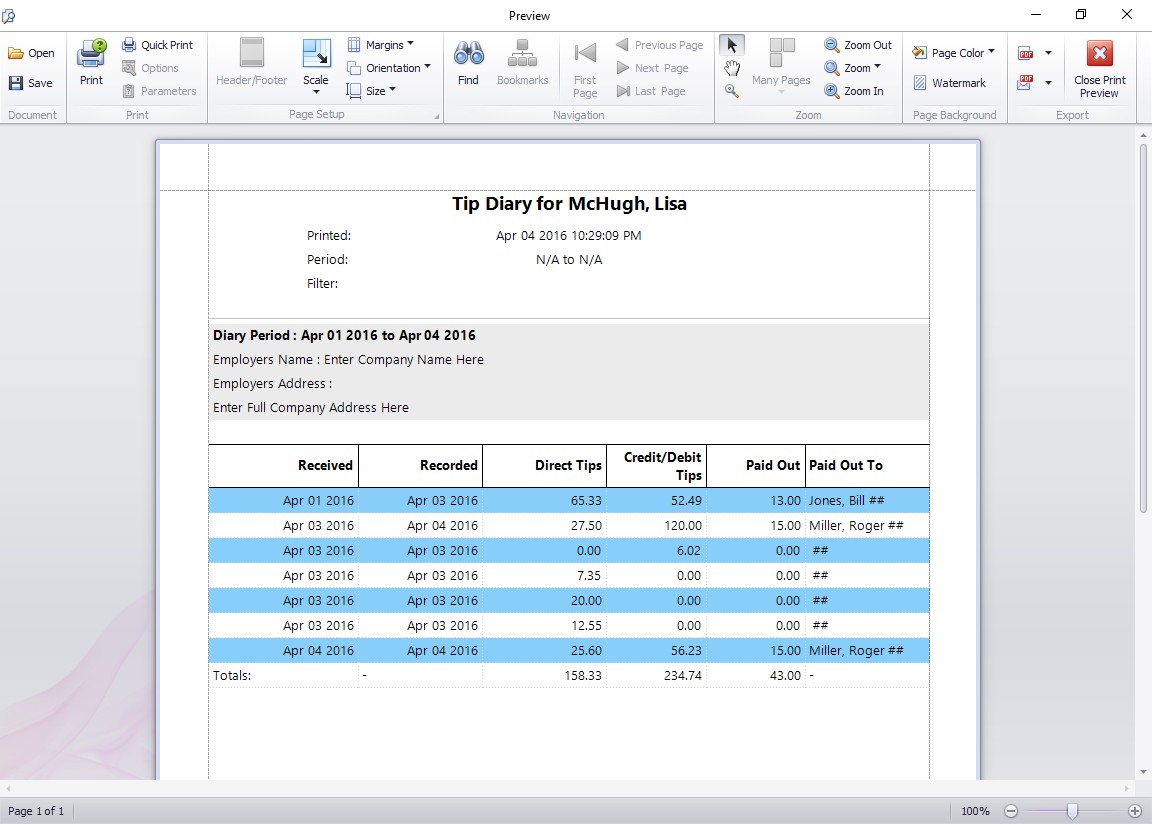
The Employee Tip Diary Report
The Employee Tip Diary Report
The employee tip diary report gives full details of each entry made by the employee into their tip diary across the reporting date range. Totals are then displayed for each type of tip over the reporting period. This report is very similar to Form 4070A Employee’s Daily Record of Tips which is available from the IRS.
The Employee Tip Diary Summary Report
The Employee Tip Diary Summary Report
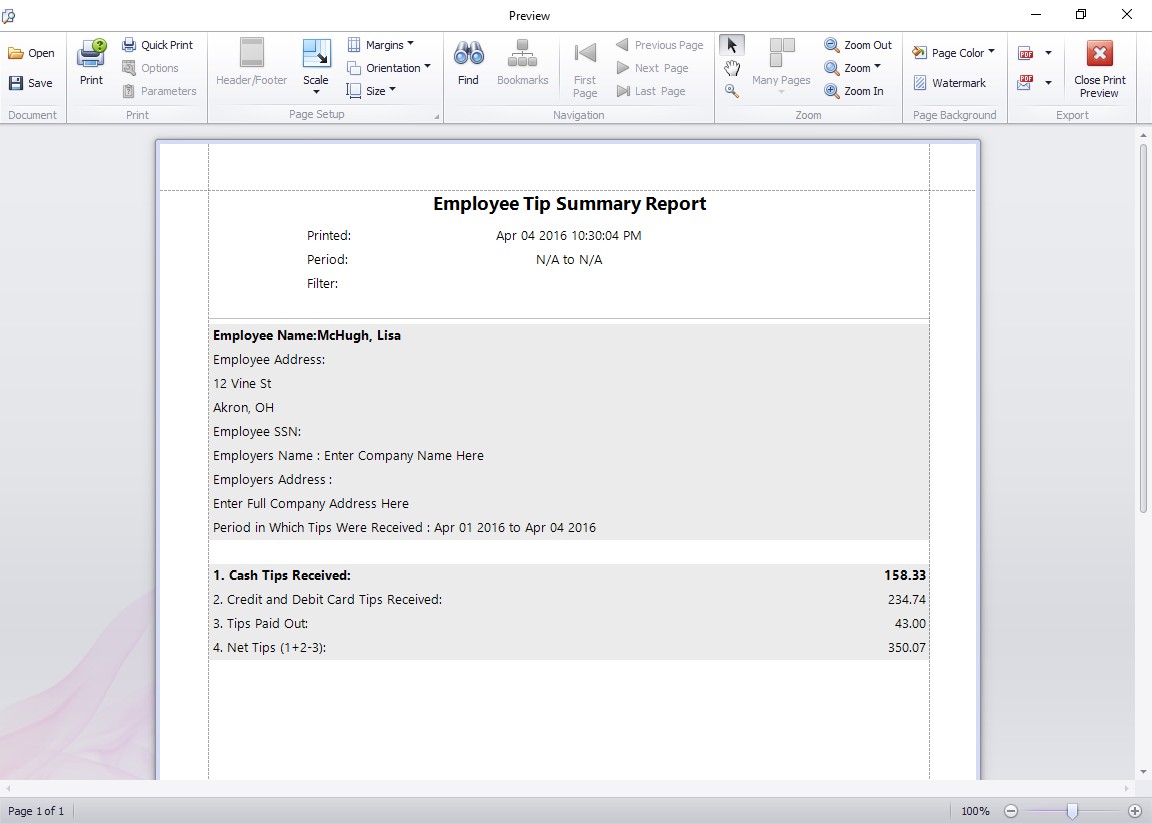
The employee tip diary summary report produces a very easy to read summary of the employee tip activity over the selected reporting range. Totals are displayed for each type of tip over the reporting period. This report is very similar to Form 4070 Employee’s Report of Tips to Employer which is available from the IRS.
by Mark Nemtsas | Apr 18, 2012 | How To
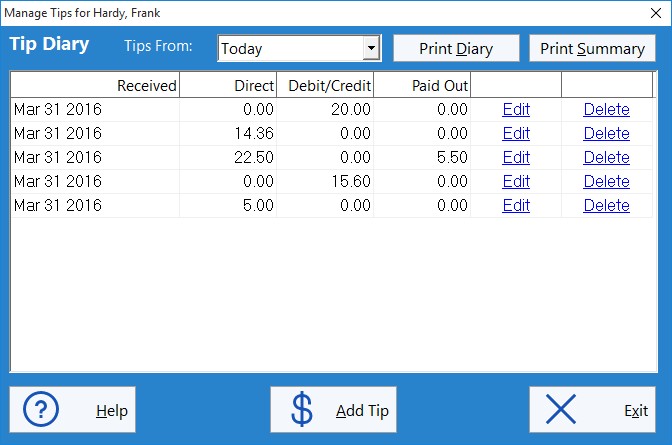
This Time Clock MTS How To Article covers how employees can record a tip using the Time Clock MTS employee tip tracking system.
- The first step is to log in as the Time Clock MTS administrator and enable tip tracking. This was covered in the how to article How to Setup Employee Tip Tracking.
- Employees will now be able to see the Employee Tip Tracking button on the time clock. To enter a tip they should click this button and they’ll be shown the Employee Tip Diary which can be seen in the image at the top of this article.
- The Employee Tip Diary is used by employees to add, edit or delete employee tips. To add a new tip employees must click the Add Tip button.
The Add Tip Screen
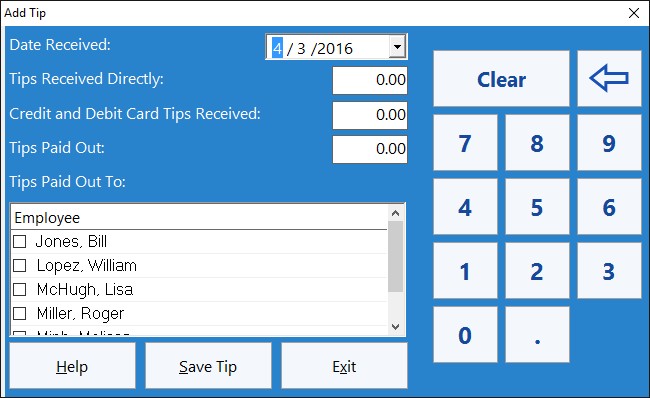
- The Add Employee Tip screen (shown above) allows employees to enter details of a tip or gratuity that they’ve received. The details of the tip (date received and cash or credit amount) are entered into the fields on the left side of the form. Data can be entered via a keyboard or via the numeric keypad on the right.
- If the employee has paid out the tip to other employees they should enter an amount into the Tips Paid Out field and then select the employee(s) paid out to from the employee list box.
- When the employee is happy with the details of the tip to be added they must click the Save Tip button and the tip will be added the employee’s tip diary.


